Hello everyone! In my last post, I shared the wreaths I made for my home. After taking that class at Michael's I got introduced to decorative mesh ribbon. I got hooked on that stuff and had to make more wreaths. LOL!
While I was in the class, I saw one that the teacher made. It was a beautiful, big and light weight wreath. This was a popular style and others were going to make it too. I just loved them and had to make that for my mom and mother-in-law.
I went to Pinterest and YouTube to get some ideas and more instruction and that really helped. This was such an easy project and the mesh is so resilient too.
So last Saturday was delivery day. The moms were all excited and we were thrilled to give them such a wonderful gift.
Today's post is about the one I made for my mom. Here's how I did it and how it turned out.
So you can imagine it was a "love fest" when my mom got her wreath. LOL! She absolutely loved it and hadn't seen anything like this before. It was a joy making this gift knowing it would bring such joy. Awwwww, now I know how Santa Clause feels. LOL!
Next time I will share my other wreath. So hope you visit again!
While I was in the class, I saw one that the teacher made. It was a beautiful, big and light weight wreath. This was a popular style and others were going to make it too. I just loved them and had to make that for my mom and mother-in-law.
I went to Pinterest and YouTube to get some ideas and more instruction and that really helped. This was such an easy project and the mesh is so resilient too.
So last Saturday was delivery day. The moms were all excited and we were thrilled to give them such a wonderful gift.
Today's post is about the one I made for my mom. Here's how I did it and how it turned out.
 |
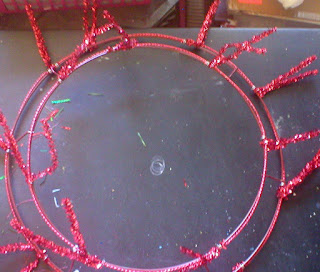
| I started with this wire wreath that came with chenille ties already attached. I got mine at Michael's and the had a few different sizes and colors. |
 |
| Next, I used two sizes of mesh ribbon. |
 |
| Then I gathered and tied the mesh around the circle- top then bottom layers. |
 |
| Added some Christmas tree ornaments and that was it. |
So you can imagine it was a "love fest" when my mom got her wreath. LOL! She absolutely loved it and hadn't seen anything like this before. It was a joy making this gift knowing it would bring such joy. Awwwww, now I know how Santa Clause feels. LOL!
Next time I will share my other wreath. So hope you visit again!


Love it Kelly.
ReplyDeleteIt's GORGEOUS! I so love it. I can imagine how happy she was.
ReplyDeleteOh boy you rocked this one! Beautiful wreath and I knew your mom would love it!
ReplyDeleteKelly, this is gorgeous and I can understand how your mothers were thrilled. You have such an eye for putting things together. The tree in the center is so beautiful. Wish you lived closer, my friend!!
ReplyDelete